Friday, 28 March 2014

Bargains from the market


Quick update on my market trip.

One of the advantages of occasionally working from home, is that you get to go shopping midweek. 
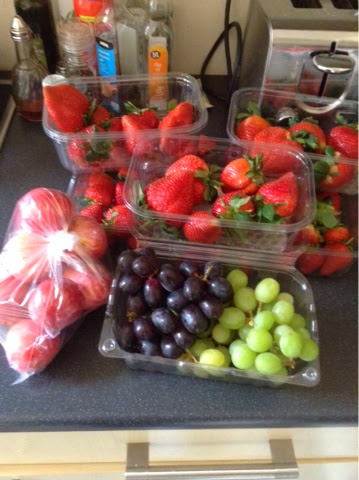
One of the disadvantages is, you're supposed to be working!  So I nipped to the market and picked up some fruit. Mainly to prevent snacking.

All of this for £3!


Oh yes, and some lemons and spuds too!


My quilt so far.

My quilt so far
This is going to take some time!

But I've been mainly focussed on felt owls, so have sort of neglected the patchwork.

So here we are...

The hexagon bit


Standard 9 square block - and it is actually square, its just the angle!


Log Cabin - I've got so much scrap material, I may do a few of these


Its a lot easier to cut than hexagons! Basically used my trusty rotary cutter to cut 1 ½” strips and then cut them to the correct length.  I suppose they could be done on a sewing machine as they're straight lines, but I want to take them with me on my travels, and traditionally, all quilts were hand sewn.

The quilt.

Because of the material I have available, mine is mainly shades of blue and red.  I've used some material left over from another project (navy) and a light blue patterned material which was a pillow case.  There's also some material from the top I made a while ago .Finished top

The rest of it was purchased as  'fat quarters'.

OOPS!!!
Another important note, as I discovered when I made the little blue bag.  Try not to use gingham, the lines often aren't straight for some reason.

This was meant to be a 'disappearing nine patch' but I think I'll unpick it.
Disappearing nine patch - make a nine patch and then cut it into quarters, its often used for borders. Gives a slightly different effect.


Wednesday, 26 March 2014

Budgeteering again

Working with cash is REALLY working for me, and making me think about what I'm spending a bit more.
So for the last 2 months, I've been sticking with taking out money and seeing how long it lasts, rather than having a budget, which I tend to look at as something I need to reach.
At the start of March I drew £100, and only took more money out when I needed it. I do have a figure in mind, for what my budget is, and as of now I still have £100 left of that, so quite pleased.

I've previously said how much I like shopping in the local market, and am really looking forward to the fact that I'm working from home on Friday so can go and pick up some bargains.

Speaking of which, in the 'you get what you pay for' stakes, these spuds are winners.  Now, I know that you should be able to keep root veg for ages, but I've never managed it with shop bought stuff. 


Just before Christmas I got a veg box from my favourite farm shop Kenyons Hall Farm and put the root veg, as usual into open baskets, and the spuds into a hessian bag. I thought I'd used them all, and then found them right at the bottom, still very useable.

Although, I have spent money on fabric. From charity shops, so does that count?


Sunday, 23 March 2014

How to make a little bag


I've a couple of these little bags, useful for taking small bits of sewing round with me, and they are made in a slightly unusual way, which means you don't have bulky seams.
First, measure out 2 rectangles, one for the front, and one for the lining. You could also use wadding if you wanted it for a tablet case.
I used a Kipling purse to get an idea of size.

Cut material to size - now the gingham I've used isn't ideal as actually, it was a bin end, and no matter what I did I couldn't get it to look straight. I've used my rotary cutter and cutting mat, as it helps me to line it up, but you could just draw the lines and cut with scissors.


You need to shape the top slightly, I used a wine glass as a template.

Work out where you want the fold to be, and make a very small cut at each edge. With right sides together, sew round the top, up to the cut.
Sew along the bottom edge.  DON'T sew up the sides. This will seem very odd and it will look something like this....

Now, this is the slightly fiddly bit.. pick it up and put the right sides of the front together, and sew down the side seams.  Do the same with the lining, sew all the way down one side, and on the other side leave a small gap.


It will then look something like this one.....


Turn it right sides out, through the little gap you've left.


Push the lining inside the bag, and this is the final result

Needs a bit of a press, but the general idea is fine.